


Table of Contents
Introduction
In the ever-evolving world of app development, speed, efficiency, and collaboration are of the essence. One powerful combination that has emerged to streamline the process is “Figma to Flutter.” Figma, a cloud-based design tool, and Flutter, Google’s open-source UI toolkit, make for a seamless transition from design to development. In this blog, we’ll explore how Figma and Flutter work together to revolutionize app development.
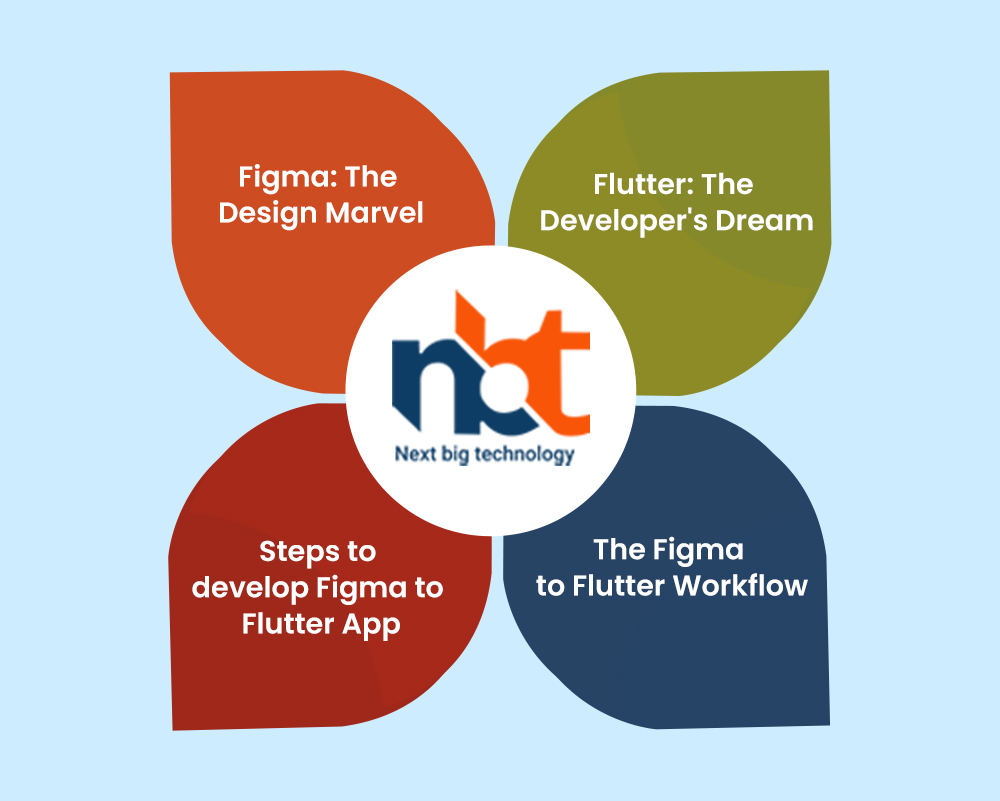
Figma: The Design Marvel
Figma is a cloud-based design tool that has gained immense popularity among designers and developers alike. Its collaborative features and real-time editing capabilities make it a favorite choice for creating stunning user interfaces. Here’s how Figma fits into the development process:
- Design Collaboration: Multiple team members can collaborate in real-time on Figma projects, enhancing productivity and communication. Designers, developers, and stakeholders can work together seamlessly.
- Responsive Design: Figma allows designers to create responsive designs that adapt to different screen sizes and orientations, a critical feature in the mobile-first world.
- Prototyping: Figma offers powerful prototyping tools to create interactive mockups that simulate the app’s behavior, making it easier for developers to understand the intended user experience.
- Design Components: Designers can create reusable design components in Figma, such as buttons, navigation bars, and icons. These components can be easily integrated into the development process.
Flutter: The Developer’s Dream
Flutter, developed by Google, is an open-source UI toolkit that simplifies the process of building natively compiled applications for mobile, web, and desktop from a single codebase. Here’s how Flutter complements Figma in the development phase:
- Single Codebase: With Flutter, developers write code once and deploy it on multiple platforms. This eliminates the need to create separate codebases for iOS and Android, saving time and effort.
- Rich Widgets: Flutter offers a rich set of customizable widgets, allowing developers to create complex user interfaces with ease. These widgets can closely match the designs created in Figma.
- Hot Reload: Flutter’s “Hot Reload” feature allows developers to see changes in real-time, making it easy to iterate and fine-tune the app’s UI and functionality based on the Figma designs.
- Performance: Flutter apps are known for their high performance due to the use of the Dart programming language and a compiled, machine code execution model.
The Figma to Flutter Workflow
The magic of Figma to Flutter lies in the seamless workflow it enables:
- Design in Figma: Designers create the app’s user interface in Figma, using its collaborative features to get feedback and approval from stakeholders.
- Export Assets: Figma allows designers to export assets, such as images and icons, directly to Flutter-compatible formats.
- Code Generation: Developers can use plugins like “Figma to Flutter” to generate Dart code from Figma designs. This code includes widgets that closely resemble the designs.
- Integration: The generated code is integrated into the Flutter project, making it easy for developers to build the app’s UI using the assets and widgets from Figma.
- Development and Testing: Developers can now focus on the app’s functionality, using Flutter’s powerful capabilities to bring the design to life. The Hot Reload feature makes testing and refinement a breeze.
- Deployment: Once the app is ready, it can be deployed to various platforms, including iOS, Android, and the web, all from the same codebase.
The Figma to Flutter workflow is a game-changer in the world of app development. It bridges the gap between design and development, fostering collaboration, reducing duplication of effort, and accelerating the time-to-market for apps. With Figma’s design prowess and Flutter’s development efficiency, teams can create visually stunning and highly functional apps that cater to today’s fast-paced digital landscape. The future of app development is here, and it’s called Figma to Flutter.
Steps to develop Figma to Flutter App
Developing a Flutter app from Figma designs involves several steps to ensure a seamless transition from design to development. Here’s a step-by-step guide to help you create a Flutter app based on your Figma designs: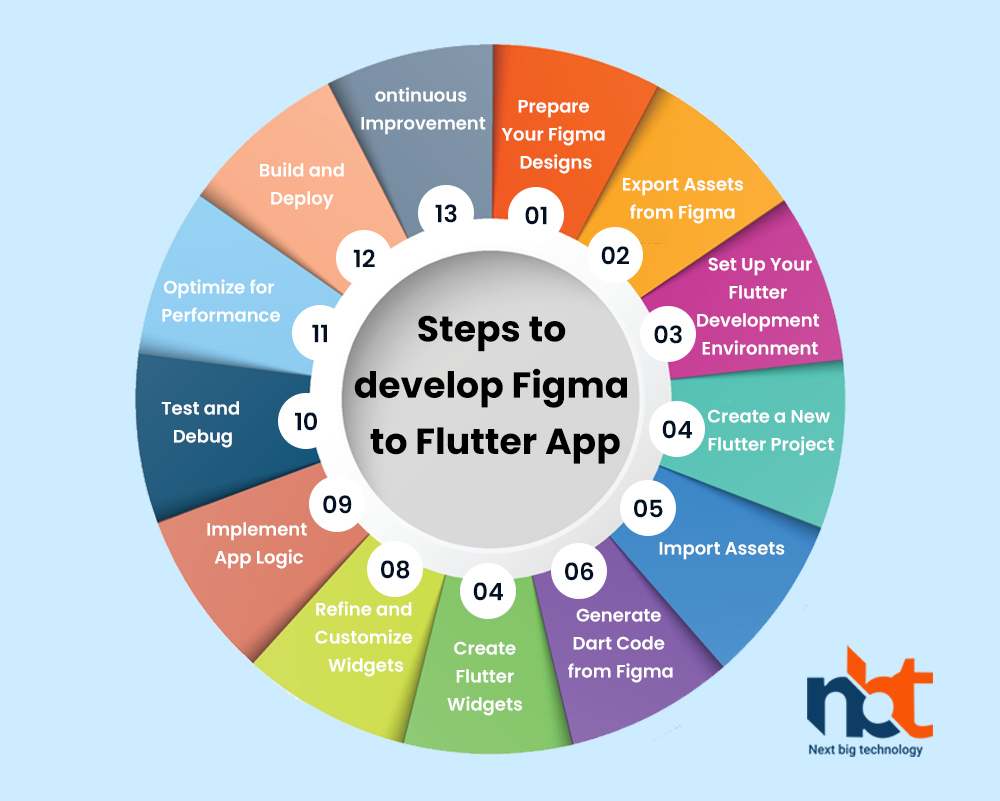
Step 1: Prepare Your Figma Designs
Before you start developing your Flutter app, make sure your Figma designs are well-organized and include all the necessary screens and assets. Ensure that your designs are consistent and follow Flutter’s guidelines for app design.
Step 2: Export Assets from Figma
Figma allows you to export assets such as images and icons in various formats. Export these assets, as they will be used in your Flutter app. Common export formats include PNG, SVG, and JPG.
Step 3: Set Up Your Flutter Development Environment
If you haven’t already, set up your development environment for Flutter. You can follow the official Flutter installation guide for your operating system: Flutter Installation Guide
Step 4: Create a New Flutter Project
Use the Flutter CLI to create a new Flutter project. Navigate to the directory where you want to create your project and run the following command:
flutter create your_project_name
Step 5: Import Assets
Place the assets (images, icons, etc.) exported from Figma into the assets directory of your Flutter project. Update your pubspec.yaml file to include these assets. Here’s an example:
flutter:
assets:
– assets/images/
– assets/icons/
Step 6: Generate Dart Code from Figma
There are several plugins and tools available to generate Dart code from Figma designs. One popular tool is the “Figma to Flutter” plugin. Follow these steps to use it:
- Install the “Figma to Flutter” plugin in Figma.
- Open your Figma design file.
- Select the layers or components you want to export to Flutter.
- Use the “Figma to Flutter” plugin to export the selected layers as Dart code.
- Copy the generated Dart code to your clipboard.
Step 7: Create Flutter Widgets
In your Flutter project, create Flutter widgets based on the generated Dart code. This code will define the structure and appearance of your app’s UI components, closely matching your Figma designs.
Step 8: Refine and Customize Widgets
Customize the generated widgets to match your design requirements precisely. You may need to make adjustments to text styles, colors, and layouts to ensure a pixel-perfect match with your Figma designs.
Step 9: Implement App Logic
Now that you have your UI components in place, start implementing the app’s logic. This includes adding functionality to buttons, navigation, user interactions, and integrating data sources if required.
Step 10: Test and Debug
Regularly test your app on various devices and screen sizes to ensure that it looks and functions as expected. Use Flutter’s “Hot Reload” feature to make quick adjustments and refinements.
Step 11: Optimize for Performance
Optimize your app for performance by following best practices in Flutter development. Pay attention to animations, image loading, and overall app responsiveness.
Step 12: Build and Deploy
Once you are satisfied with your Flutter app, build it for the target platforms, such as iOS and Android. Use the following command to build the app for a specific platform:
flutter build [platform]
Finally, deploy your app to app stores (Google Play Store for Android and Apple App Store for iOS) and the web if desired.
Step 13: Continuous Improvement
App development is an ongoing process. Continuously gather user feedback, monitor app performance, and make updates and improvements based on user needs and technology advancements.
By following these steps, you can smoothly transition from Figma designs to a fully functional Flutter app, resulting in a visually appealing and feature-rich user experience.