


Table of Contents
Understanding Flutter for Web Development
In the ever-evolving landscape of web development, staying ahead of the curve is paramount. One technology that has been making waves in the development community is Flutter. Originally designed for mobile app development, Flutter has now expanded its horizons to web development, offering developers a versatile and powerful framework to build beautiful and responsive web applications. In this guide, we’ll delve into what Flutter is, its benefits for web development, and how you can get started with it.
What is Flutter?
Flutter is an open-source UI software development kit created by Google. It enables developers to craft natively compiled applications for mobile, web, and desktop from a single codebase. What sets Flutter apart is its use of a single programming language, Dart, which is easy to learn and offers excellent performance.
Benefits of Using Flutter for Web Development
1. Single Codebase: With Flutter, developers can write code once and deploy it across multiple platforms, including the web. This significantly reduces development time and effort, as there’s no need to maintain separate codebases for different platforms.
2. Fast Development: Flutter’s hot reload feature allows developers to see changes in real-time, speeding up the development process. This iterative approach enhances productivity and enables quick experimentation with different UI elements and layouts.
3. Beautiful UIs: Flutter offers a rich set of customizable widgets and tools for building stunning user interfaces. Whether it’s complex animations or intricate designs, Flutter provides the flexibility to bring your vision to life with ease.
4. Performance: Flutter’s use of a compiled programming language like Dart ensures high-performance applications. By compiling code directly to native machine code, Flutter apps deliver smooth animations and fast rendering, even on the web.
5. Cross-Platform Compatibility: Flutter eliminates the need to compromise on user experience across different platforms. Whether your application is running on the web, iOS, or Android, Flutter ensures consistency in design and functionality, providing users with a seamless experience.
Getting Started with Flutter for Web Development
1. Install Flutter: Begin by installing Flutter on your system. You can download the Flutter SDK from the official website and follow the installation instructions provided.
2. Set Up Your Development Environment: Once Flutter is installed, set up your development environment by configuring your preferred code editor and installing any necessary plugins or extensions for Flutter development.
3. Create a New Project: Use the Flutter CLI to create a new Flutter project. You can choose the web platform as the target when creating the project, which will generate the necessary files and directories for web development.
4. Write Your Code: Start writing your Flutter code using Dart programming language. Leverage Flutter’s extensive widget library to design your application’s UI and incorporate any desired functionality.
5. Test and Debug: Use Flutter’s hot reload feature to test your application in real-time and make any necessary adjustments. Debugging tools provided by Flutter help identify and fix any issues that may arise during development.
6. Deploy Your Web Application: Once your web application is ready, you can deploy it to the web using Flutter’s built-in deployment tools. Flutter provides options for hosting your application on various platforms, ensuring it reaches your target audience effectively.
Setting Up Your Development Environment

In the world of programming, having a well-configured development environment is akin to having a reliable toolbox for a craftsman. It’s the foundation upon which you build your projects, test your code, and bring your ideas to life. Whether you’re a seasoned developer or just starting out on your coding journey, setting up your development environment effectively is crucial for productivity and success. In this guide, we’ll walk you through the essential steps to set up your development environment seamlessly.
Understanding Your Requirements: Before diving into the setup process, it’s essential to understand the specific requirements of your project and the technologies involved. Are you developing a web application, a mobile app, or perhaps delving into data science? Each domain may require different tools and configurations. Consider factors like programming languages, frameworks, databases, and any other dependencies your project may have.
Choose Your Operating System: The first decision you’ll need to make is selecting an operating system for development. While many developers prefer Unix-based systems like Linux or macOS for their robust command-line interfaces and development-friendly environments, Windows is also a popular choice. Choose the one that aligns best with your preferences and project requirements.
Installing a Text Editor or IDE: A text editor or Integrated Development Environment (IDE) is your primary interface for writing and editing code. Popular choices include Visual Studio Code, Sublime Text, Atom, and JetBrains IntelliJ IDEA. Each offers unique features and customization options, so experiment with a few to find the one that suits your workflow best.
Version Control with Git: Version control is essential for managing your codebase effectively, collaborating with team members, and tracking changes over time. Git, with platforms like GitHub, GitLab, or Bitbucket, is the industry standard for version control. Install Git and set up an account on your chosen platform to begin managing your projects efficiently.
Installing Required Software and Dependencies: Depending on your project’s requirements, you may need to install additional software and dependencies. This could include programming language runtimes (e.g., Python, Node.js), databases (e.g., MySQL, PostgreSQL), web servers (e.g., Apache, Nginx), and development frameworks (e.g., React, Angular, Django). Use package managers like npm, pip, or Homebrew to simplify the installation process and manage dependencies effortlessly.
Virtual Environments and Containerization: To avoid conflicts between different projects and ensure consistent development environments, consider using virtual environments or containerization tools like Docker. Virtual environments isolate project dependencies, allowing you to work on multiple projects with different requirements simultaneously. Docker containers provide even greater isolation and portability, enabling you to package your application and its dependencies into a lightweight, reproducible unit.
Configuration and Customization: Take the time to customize your development environment to suit your preferences and workflow. This might involve configuring your text editor or IDE, setting up keyboard shortcuts, installing plugins or extensions, and fine-tuning your shell environment. Investing time in customization can significantly boost your productivity and make development more enjoyable.
Testing Your Setup: Once you’ve set up your development environment, it’s essential to test it thoroughly to ensure everything is working as expected. Create a simple “Hello, World!” project or clone a starter template for your chosen technology stack and verify that you can build, run, and debug code successfully. Address any issues or errors promptly to avoid headaches down the line.
Choosing the Right Tools and Libraries
In today’s fast-paced digital landscape, selecting the right tools and libraries for your project can be a daunting task. With a plethora of options available, each boasting unique features and functionalities, making an informed decision is crucial to the success of your endeavor. Whether you’re a seasoned developer or just starting out, this guide aims to simplify the process and help you navigate through the sea of choices effectively.
Define Your Project Requirements: Before delving into the vast array of tools and libraries, it’s essential to have a clear understanding of your project requirements. Determine the specific functionalities and features your project demands, as well as any constraints or limitations you may encounter along the way. Consider factors such as scalability, performance, security, compatibility, and ease of integration into your existing tech stack.
Research and Explore: Once you have a clear grasp of your project’s requirements, it’s time to embark on a journey of research and exploration. Start by leveraging online resources such as forums, blogs, and developer communities to gather insights and recommendations from industry experts and fellow developers. Explore popular platforms like GitHub, npm, and PyPI to discover trending tools and libraries that align with your project’s needs.
Evaluate Options: With a plethora of options at your disposal, it’s essential to evaluate each tool and library meticulously. Pay close attention to factors such as documentation quality, community support, active development, licensing, and performance benchmarks. Take advantage of trial periods, demos, and sample projects to get hands-on experience and assess the suitability of each option for your project.
Consider Ecosystem Compatibility: When selecting tools and libraries, consider their compatibility with your project’s ecosystem and existing technologies. Opt for solutions that seamlessly integrate with your chosen programming languages, frameworks, and development environments. Avoid introducing unnecessary complexities or dependencies that may hinder the scalability and maintainability of your project in the long run.
Seek Feedback and Reviews: Don’t hesitate to seek feedback and reviews from peers, colleagues, and industry professionals who have experience using the tools and libraries you’re considering. Their insights and firsthand experiences can provide valuable perspectives and help you make more informed decisions. Additionally, browse through online reviews, ratings, and case studies to gain further insights into the strengths and weaknesses of each option.
Plan for Flexibility and Future Growth: In the rapidly evolving landscape of technology, it’s crucial to plan for flexibility and future growth when choosing tools and libraries for your project. Prioritize solutions that offer robust support, frequent updates, and a thriving community to ensure longevity and adaptability. Keep an eye out for emerging trends and advancements in technology that may influence your decision-making process.
Planning Your Flutter Web Application Architecture

In the dynamic realm of web development, choosing the right architecture for your Flutter web application is paramount. Flutter, Google’s UI toolkit, has gained immense popularity for its cross-platform capabilities and expressive UI designs. However, without a well-thought-out architecture, your Flutter web app may face challenges in scalability, maintainability, and performance. In this guide, we delve into the essentials of planning your Flutter web application architecture to ensure a robust foundation for your project’s success.
Understanding Flutter Web Application Architecture
Before diving into planning, it’s crucial to understand the fundamentals of Flutter web application architecture. Flutter follows a widget-based architecture, where everything is a widget, allowing for a consistent and flexible UI across platforms. When it comes to web applications, Flutter utilizes the DOM (Document Object Model) to render UI elements in the browser.
Key Considerations for Planning
1. Project Structure: Establishing a clear project structure lays the groundwork for organized development. Divide your project into logical modules, such as UI components, business logic, data handling, and platform-specific code. Flutter’s modular approach enables easier navigation and collaboration among team members.
2. State Management: Efficient state management is critical for maintaining application state across widgets and screens. Evaluate various state management solutions like Provider, Bloc, Redux, or Riverpod based on your project’s complexity and requirements. Choose a solution that offers scalability, performance, and ease of integration with Flutter web.
3. API Integration: Integrating APIs seamlessly is vital for fetching and updating data in your Flutter web application. Consider using packages like Dio or HTTP for making HTTP requests. Additionally, explore GraphQL for more efficient data querying and manipulation, especially for complex data requirements.
4. Responsive Design: Ensure your Flutter web application adapts seamlessly to various screen sizes and orientations. Leverage Flutter’s layout widgets like MediaQuery, Expanded, and Flexible for responsive design implementation. Test your app across different devices and resolutions to guarantee a consistent user experience.
5. Performance Optimization: Optimizing performance is crucial for delivering a smooth user experience. Minimize unnecessary widget rebuilds by using const constructors and immutable widgets wherever possible. Implement lazy loading for large data sets and optimize asset loading for faster startup times.
Best Practices for Flutter Web Architecture
1. Separation of Concerns: Follow the principle of separation of concerns to keep your codebase modular and maintainable. Separate UI, business logic, and data handling into distinct layers, reducing code coupling and enhancing code reusability.
2. Test-Driven Development (TDD): Embrace Test-Driven Development to ensure the reliability and stability of your Flutter web application. Write unit tests and integration tests for critical components and functionalities, fostering a culture of quality assurance and continuous improvement.
3. Continuous Integration and Deployment (CI/CD): Implement CI/CD pipelines to automate the build, testing, and deployment processes. Tools like Jenkins, Travis CI, or GitHub Actions can streamline the development workflow, enabling faster iteration cycles and seamless delivery of updates to production.
4. Documentation: Document your Flutter web application architecture comprehensively to aid future development and onboarding of new team members. Provide clear guidelines, code examples, and architectural diagrams to facilitate understanding and collaboration.
5. Community and Support: Tap into the vibrant Flutter community for guidance, support, and best practices. Engage in forums, attend meetups, and leverage resources like official documentation, blogs, and tutorials to stay updated with the latest developments and innovations in Flutter web development.
Designing User Interfaces with Flutter Widgets
In the ever-evolving landscape of mobile application development, creating user interfaces (UIs) that are both visually appealing and highly functional is paramount. Flutter, Google’s UI toolkit for building natively compiled applications for mobile, web, and desktop from a single codebase, has revolutionized the way developers approach UI design. With its extensive library of widgets, Flutter offers developers a powerful arsenal to craft stunning and intuitive user experiences.
Understanding Flutter Widgets
At the core of Flutter’s UI development are widgets – the building blocks of every Flutter application. Widgets in Flutter are lightweight, interactive elements that define the UI layout and behavior. From simple buttons and text fields to complex animations and transitions, Flutter widgets empower developers to create dynamic and engaging interfaces with ease.
Choosing the Right Widgets
When designing a user interface with Flutter, selecting the right widgets for the job is crucial. Flutter provides a wide range of pre-built widgets categorized into Material Design and Cupertino (iOS) style widgets, enabling developers to seamlessly adapt their UIs to the platform’s design guidelines.
For instance, Material Design widgets offer a modern and customizable UI framework for Android applications, while Cupertino widgets provide a native iOS look and feel, ensuring consistency across different platforms. By leveraging these platform-specific widgets, developers can deliver a native-like experience to users regardless of the device they’re using.
Crafting Responsive Layouts
One of the key advantages of Flutter is its flexible and responsive layout system. With Flutter, developers can create UI layouts that adapt seamlessly to various screen sizes and orientations, eliminating the need for separate codebases for different devices.
Flutter’s layout widgets, such as Row, Column, and Stack, allow developers to arrange UI elements in rows, columns, or layered stacks, providing precise control over the app’s layout. Additionally, Flutter’s constraint-based layout system enables developers to define responsive UIs that automatically adjust to different screen sizes, ensuring a consistent user experience across devices.
Customizing Widgets
While Flutter offers a rich set of pre-built widgets out of the box, developers often need to customize these widgets to match their app’s unique design requirements. Flutter’s composability and flexibility make it easy to customize widgets using properties like color, size, padding, and more.
Furthermore, Flutter’s support for custom painting and animation enables developers to create entirely custom widgets from scratch, allowing for limitless creativity in UI design. Whether it’s implementing complex animations or designing custom interactive elements, Flutter empowers developers to bring their UI visions to life with precision and efficiency.
Testing and Iterating
Effective UI design is an iterative process that requires continuous testing and refinement. Flutter’s hot reload feature enables developers to make real-time changes to the UI code and see the results instantly, streamlining the development and iteration process.
Additionally, Flutter provides robust testing tools, such as widget testing and integration testing, allowing developers to ensure the reliability and performance of their UI components across different scenarios and devices.
Managing State in Flutter Web Applications

In the realm of modern web development, Flutter has emerged as a powerful framework for building stunning, high-performance applications. With its seamless cross-platform capabilities, Flutter enables developers to create beautiful user interfaces for both mobile and web platforms using a single codebase. However, as applications grow in complexity, managing state becomes increasingly crucial for maintaining a robust and maintainable codebase.
State management lies at the heart of every Flutter application, dictating how data is stored, updated, and propagated throughout the app. In the context of web applications, effective state management is particularly vital to ensure smooth user interactions and seamless data flow across different components.
Here, we delve into the intricacies of managing state in Flutter web applications, exploring various techniques and best practices to streamline your development process.
Understanding State in Flutter
Before diving into state management techniques, it’s essential to understand the concept of state in Flutter. In Flutter, state refers to any data that can change over time, such as user input, network responses, or application logic. Flutter widgets can be classified into two categories based on their handling of state: stateful and stateless.
- Stateful Widgets: These widgets maintain mutable state, allowing them to change their appearance or behavior in response to user interactions or other factors.
- Stateless Widgets: These widgets are immutable and do not store any state internally. Their appearance is solely based on the configuration provided during their creation.
Built-in State Management Solutions
Flutter provides several built-in mechanisms for managing state, each tailored to specific use cases and preferences:
- setState(): The simplest form of state management in Flutter involves using the
setState()method to rebuild the widget tree whenever the state changes. While straightforward, this approach is suitable for managing state within individual widgets and small applications. - InheritedWidget: InheritedWidget allows you to propagate state down the widget tree to its descendants efficiently. It’s particularly useful for sharing state across multiple widgets without passing it explicitly through constructor parameters.
- Provider Package: Developed by the Flutter team, the Provider package offers a simple and scalable solution for state management, based on the concept of dependency injection. It allows you to expose state to descendant widgets while minimizing boilerplate code.
- Bloc Pattern: The Bloc pattern (Business Logic Component) is a design pattern that separates business logic from UI components, promoting a clear separation of concerns. It’s well-suited for managing complex state and asynchronous operations in Flutter applications.
Choosing the Right State Management Approach
Selecting the most suitable state management approach depends on various factors, including the size and complexity of your application, team preferences, and future scalability requirements. While simpler applications may suffice with setState() or InheritedWidget, larger projects often benefit from more structured solutions like Provider or Bloc.
When deciding on a state management approach, consider the following criteria:
- Scalability: Will the chosen approach scale effectively as your application grows in complexity?
- Performance: How efficiently does the solution handle state updates and widget rebuilds?
- Developer Experience: Is the API intuitive and easy to work with? Does it promote code maintainability and readability?
- Community Support: Is the solution well-documented with an active community providing support and updates?
Best Practices for State Management in Flutter Web Applications
Regardless of the chosen state management approach, adhering to best practices can help ensure a smooth development experience and maintainable codebase:
- Minimize Mutable State: Avoid excessive mutable state within your application, as it can lead to unpredictable behavior and debugging challenges.
- Separation of Concerns: Maintain a clear separation between UI components and business logic, following principles like the Bloc pattern to achieve modularity and testability.
- Use Immutable Data Structures: Immutable data structures, such as those provided by the Dart
collectionpackage, help prevent unintended side effects and make state management more predictable. - Optimize Rebuilds: Minimize unnecessary widget rebuilds by leveraging techniques like
constconstructors andBuilderwidgets to optimize performance. - Monitor State Changes: Implement debugging tools and logging mechanisms to track state changes and diagnose potential issues during development.
Implementing Navigation and Routing
In the vast realm of web development, navigation and routing stand as fundamental pillars, guiding users seamlessly through digital landscapes. Implementing effective navigation and routing systems not only enhances user experience but also optimizes accessibility and functionality. In this comprehensive guide, we delve into the intricate world of navigation and routing, exploring best practices, techniques, and tools to empower developers in crafting intuitive and efficient web experiences.
Understanding Navigation: Navigation serves as the digital compass, enabling users to traverse websites with ease and efficiency. A well-designed navigation system should be intuitive, consistent, and accessible across all devices and platforms. Here are key considerations for implementing effective navigation:
- Clear Hierarchy: Organize content in a logical hierarchy, prioritizing important sections and ensuring effortless navigation flow.
- Minimalism: Avoid clutter by limiting the number of menu items and prioritizing essential links to prevent overwhelming users.
- Responsive Design: Embrace responsive design principles to ensure seamless navigation across various screen sizes and devices.
- Visual Cues: Utilize visual cues such as color contrast, icons, and hover effects to guide users and enhance navigation clarity.
Routing Essentials: Routing empowers web applications to handle different URLs and direct users to appropriate content or actions. Whether building single-page applications (SPAs) or multi-page websites, mastering routing is crucial for seamless user experiences. Key components of effective routing include:
- Route Definition: Define routes for different URLs, mapping them to specific components or views within the application.
- Route Parameters: Utilize route parameters to dynamically handle variable data, such as user IDs or product names, enhancing flexibility and scalability.
- Nested Routes: Implement nested routes to modularize complex applications, dividing them into manageable components and enhancing maintainability.
- Route Guards: Employ route guards to control access to specific routes based on authentication, authorization, or other conditions, bolstering security and user privacy.
Tools and Frameworks: A plethora of tools and frameworks streamline the implementation of navigation and routing in web development. Here are some popular choices:
- React Router: A declarative routing library for React applications, offering dynamic route matching, nested routes, and navigation lifecycle management.
- Vue Router: The official routing solution for Vue.js, providing seamless integration with Vue components and powerful navigation capabilities.
- Angular Router: A comprehensive routing and navigation library for Angular applications, supporting features like lazy loading, route guards, and parameterized routing.
- Next.js: A React framework that simplifies server-side rendering, routing, and navigation, enabling developers to build SEO-friendly and high-performance web applications.
Handling Authentication and Authorization

In the realm of digital security, two fundamental pillars stand tall: authentication and authorization. In the dynamic landscape of cyberspace, where data breaches and cyber threats loom large, mastering these concepts is paramount for safeguarding sensitive information and ensuring secure access control.
Authentication, the process of verifying the identity of users or systems, serves as the first line of defense against unauthorized access. It confirms the legitimacy of individuals or entities attempting to access a system, application, or network. From traditional methods like passwords and PINs to advanced biometric technologies such as fingerprint recognition and facial scanning, authentication mechanisms vary in complexity and reliability.
However, in today’s interconnected world, where cyberattacks grow increasingly sophisticated, relying solely on traditional authentication methods may leave systems vulnerable to exploitation. Therefore, organizations are adopting multifactor authentication (MFA) solutions to add an extra layer of security. MFA combines two or more independent credentials—such as passwords, security tokens, or biometric factors—to authenticate users, significantly reducing the risk of unauthorized access.
Yet, robust authentication alone is not sufficient to ensure comprehensive security. Enter authorization, the process of determining what actions users are permitted to perform within a system or application once their identity has been verified. While authentication answers the question, “Who are you?”, authorization addresses the query, “What are you allowed to do?”
Implementing effective authorization mechanisms involves defining roles, permissions, and access controls based on the principle of least privilege. This principle dictates that users should only be granted the minimum level of access required to perform their tasks, mitigating the potential impact of security breaches or insider threats.
Role-based access control (RBAC) and attribute-based access control (ABAC) are two prevalent authorization models used to enforce access policies. RBAC assigns permissions to roles, which are then associated with users based on their job functions or responsibilities. In contrast, ABAC evaluates various attributes—such as user attributes, resource attributes, and environmental conditions—to make access control decisions dynamically.
Furthermore, the advent of cloud computing and distributed systems has necessitated the adoption of federated identity management (FIM) and single sign-on (SSO) solutions. FIM enables seamless and secure access to multiple interconnected systems using a single set of credentials, while SSO allows users to authenticate once and access multiple applications or services without re-entering their credentials.
Despite the advancements in authentication and authorization technologies, organizations must remain vigilant against emerging threats and continuously update their security protocols. Regular security audits, threat assessments, and penetration testing are essential practices for identifying vulnerabilities and strengthening defense mechanisms.
Optimizing Performance for Flutter Web
In the ever-evolving world of web development, creating blazing-fast and seamless user experiences is paramount. With the emergence of Flutter for web, developers now have a powerful tool to build high-performance web applications. However, to fully leverage its potential, understanding and implementing performance optimization techniques is essential. In this article, we delve into strategies to optimize performance for Flutter web applications.
Understanding the Basics of Flutter Web Performance
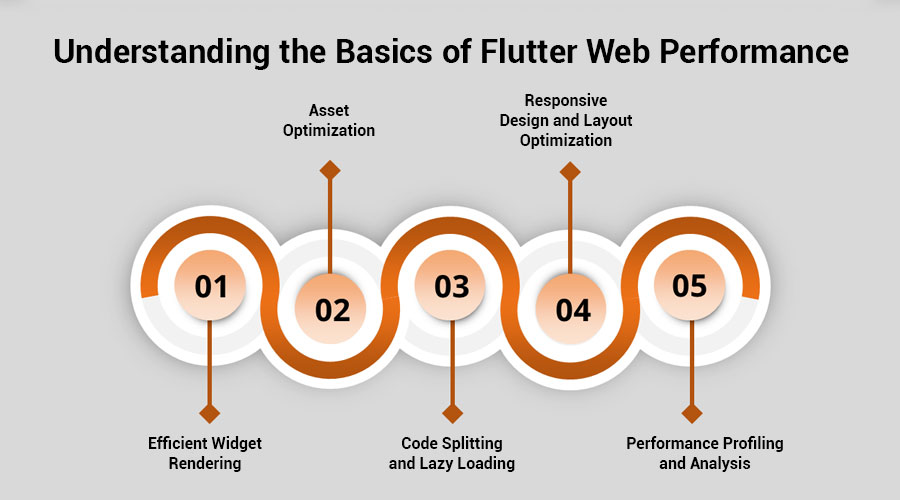
Before diving into optimization techniques, it’s crucial to grasp the fundamental factors influencing Flutter web performance. Flutter utilizes a single codebase for both web and mobile platforms, thanks to its widget-based architecture and Dart programming language. While this ensures code reusability and consistency across platforms, it also introduces challenges unique to web deployment, such as rendering efficiency, resource utilization, and browser compatibility.
1. Efficient Widget Rendering: Widgets are the building blocks of Flutter applications, responsible for UI elements and layout composition. To optimize performance, leverage Flutter’s widget lifecycle methods, such as initState() and dispose(), to manage resource-intensive operations efficiently. Additionally, utilize StatefulWidget and StatelessWidget appropriately, minimizing unnecessary widget rebuilds and rendering cycles.
2. Asset Optimization: Optimizing asset delivery is crucial for reducing load times and improving overall performance. Compress images and assets to minimize file sizes without compromising quality. Consider using tools like ImageMagick or Flutter plugins like flutter_image_compress to automate the optimization process. Furthermore, utilize CDNs (Content Delivery Networks) to cache assets and deliver them efficiently to users worldwide.
3. Code Splitting and Lazy Loading: Code splitting is a technique to divide the application code into smaller chunks and load them on-demand. Implement dynamic imports or utilize Flutter’s built-in support for code splitting to load only the necessary components when required, reducing initial load times and improving time-to-interactive metrics. Similarly, implement lazy loading for resources such as images, scripts, and data to defer loading until they are needed, further enhancing performance.
4. Responsive Design and Layout Optimization: Design responsive layouts that adapt seamlessly to various screen sizes and resolutions. Utilize Flutter’s layout widgets, such as Expanded, Flexible, and MediaQuery, to create fluid and adaptable UIs. Implement media queries and breakpoints to customize the layout based on the device’s viewport dimensions, ensuring a consistent user experience across devices.
5. Performance Profiling and Analysis: Regularly profile and analyze your Flutter web application using tools like Flutter DevTools, Chrome DevTools, or Lighthouse. Identify performance bottlenecks, memory leaks, and inefficient code patterns that impact the user experience. Optimize critical rendering paths, minimize JavaScript execution time, and eliminate unnecessary network requests to enhance performance and responsiveness.
Top Flutter Web Application Development Companies
In the ever-evolving landscape of technology, Flutter has emerged as a game-changer for web application development. With its cross-platform capabilities, exceptional performance, and visually appealing UI, Flutter has garnered significant attention from businesses seeking efficient web solutions. To navigate through the sea of options, let’s explore five top Flutter web application development companies that are reshaping the digital sphere with their expertise and innovation.
-
-
Next Big Technology:

Focus Area
- Mobile App Development
- App Designing (UI/UX)
- Software Development
- Web Development
- AR & VR Development
- Big Data & BI
- Cloud Computing Services
- DevOps
- E-commerce Development
Industries Focus
- Art, Entertainment & Music
- Business Services
- Consumer Products
- Designing
- Education
- Financial & Payments
- Gaming
- Government
- Healthcare & Medical
- Hospitality
- Information Technology
- Legal & Compliance
- Manufacturing
- Media
-
- MindInventory: MindInventory has carved a niche for itself in the Flutter development realm by delivering top-notch web applications that excel in both functionality and aesthetics. Their team of proficient Flutter developers leverages the framework’s capabilities to build scalable and responsive web solutions that resonate with modern users. From startups to enterprises, MindInventory caters to diverse clientele, ensuring unparalleled customer satisfaction.
- Agicent Technologies: Agicent Technologies has established itself as a trusted partner for businesses looking to harness the power of Flutter for web application development. With a focus on innovation and excellence, they create bespoke web solutions that elevate user experiences and drive business growth. Their holistic approach, coupled with extensive industry expertise, positions them as a preferred choice for companies seeking reliable Flutter development services.
- Quytech: Quytech is synonymous with innovation and creativity in the realm of Flutter web application development. Armed with a team of proficient developers and designers, they deliver cutting-edge web solutions that push the boundaries of technology. Whether it’s building interactive interfaces or integrating complex functionalities, Quytech excels in transforming ideas into reality, making them a go-to partner for businesses seeking next-gen web applications.
- Mindgrub: Mindgrub is renowned for its expertise in leveraging Flutter to develop high-performance web applications that deliver unparalleled user experiences. With a focus on usability and scalability, they design and deploy web solutions that align with clients’ objectives and exceed expectations. Mindgrub’s holistic approach, coupled with their commitment to innovation, has earned them a stellar reputation in the Flutter development landscape.

FAQs On Flutter Web Application Development
Are you curious about Flutter’s potential for web application development? With its rapid growth and popularity, Flutter has expanded beyond mobile platforms, making waves in web development as well. If you’re new to Flutter web development or considering it for your next project, you likely have some questions. Let’s dive into the FAQs to address your concerns and help you embark on your Flutter web journey confidently.
1. What is Flutter? Flutter is an open-source UI software development kit created by Google. Initially focused on mobile application development, Flutter has evolved to support web and desktop platforms as well. It enables developers to build visually stunning, natively compiled applications for mobile, web, and desktop from a single codebase.
2. What is Flutter Web? Flutter Web extends Flutter’s capabilities to the web, allowing developers to create interactive, feature-rich web applications using the same Flutter framework they use for mobile. It leverages the power of web technologies like HTML, CSS, and JavaScript under the hood, ensuring high performance and compatibility across modern web browsers.
3. How does Flutter Web work? Flutter Web renders user interfaces using the same principles as Flutter for mobile. It compiles Dart code to JavaScript, enabling it to run efficiently in web browsers. Flutter’s layered architecture, with its customizable widgets and high-performance rendering engine, ensures smooth and responsive web experiences.
4. Is Flutter Web suitable for production applications? Yes, Flutter Web is production-ready and has been used successfully in various real-world projects. Its performance, scalability, and ease of development make it a compelling choice for building web applications, ranging from simple websites to complex enterprise solutions.
5. Can I use existing Flutter mobile code for Flutter Web? In many cases, yes. Flutter’s “write once, run anywhere” philosophy allows you to reuse a significant portion of your existing Flutter mobile codebase for web development. While some adjustments may be necessary to optimize the user interface and ensure a seamless web experience, the core logic and business logic can often be shared between mobile and web platforms.
6. What about responsiveness and design? Flutter’s flexible layout system and responsive design principles make it well-suited for building web applications that adapt to various screen sizes and orientations. With Flutter’s hot reload feature, developers can iteratively refine and test their designs across different devices and form factors, ensuring a consistent and polished user experience.
7. How do I deploy Flutter Web applications? Deploying Flutter Web applications is straightforward. You can host your web application on any web server that serves static files. Flutter’s build process generates optimized JavaScript and asset files, which you can then upload to your hosting provider or serve directly from your server.
8. Is Flutter Web SEO-friendly? Yes, Flutter Web applications can be optimized for search engines. Flutter provides support for metadata, including titles, descriptions, and canonical URLs, allowing you to customize how your web pages appear in search engine results. Additionally, Flutter’s ability to generate clean, semantic HTML ensures that your content is easily discoverable by search engine crawlers.
9. What are the limitations of Flutter Web? While Flutter Web has made significant strides, it’s essential to be aware of its current limitations. Some web-specific features and APIs may not be fully supported yet, and performance optimizations may be required for certain use cases. However, the Flutter team is actively addressing these limitations, with ongoing improvements and updates.
10. Where can I learn more about Flutter Web development? To dive deeper into Flutter Web development, resources abound. The official Flutter website offers comprehensive documentation, tutorials, and code samples to help you get started. Additionally, online communities, forums, and social media platforms provide valuable insights, tips, and support from fellow Flutter enthusiasts and experts.
Thanks for reading our post “How To Build Flutter Web Application For Startup”. Please connect with us to learn more about Best Flutter Web Application.