


All steps for How to setup AWS EC2 Server with Ubuntu 16.04 OS
Step 1: Create your account on AWS, if you don’t have an account already and complete the whole process. For this, you would need your Credit Card details (because instances will be charged based on the usage, we can use the free tier).
Step 2: Log in to your account
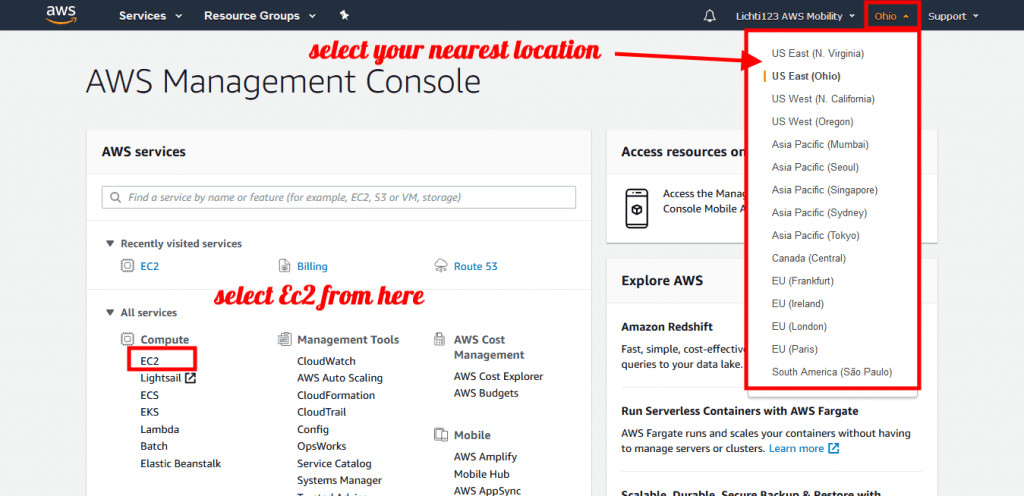
Step 3: you should choose a region. We will be select the EC2 service under Compute.
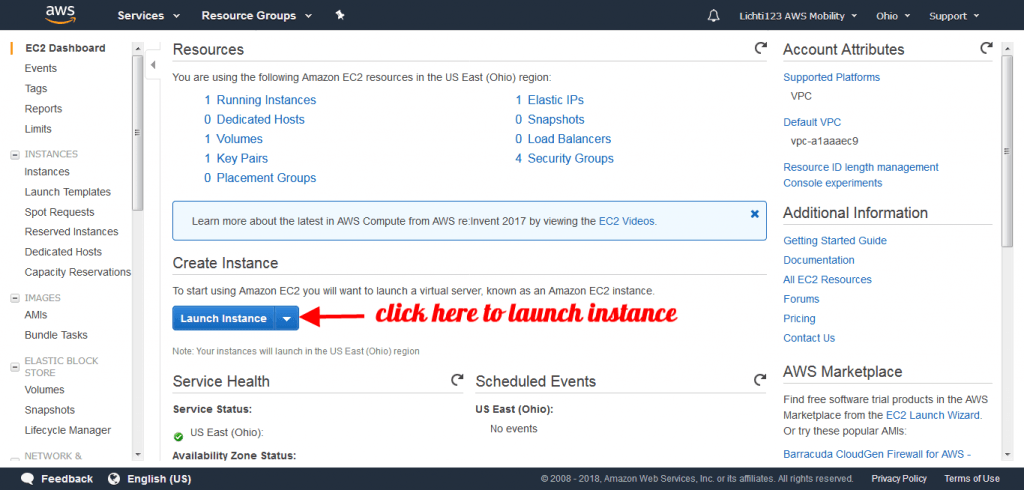
Step 4: On the EC2 dashboard, click on ‘Launch Instance’ button in the section of Create Instance as shown given screenshot
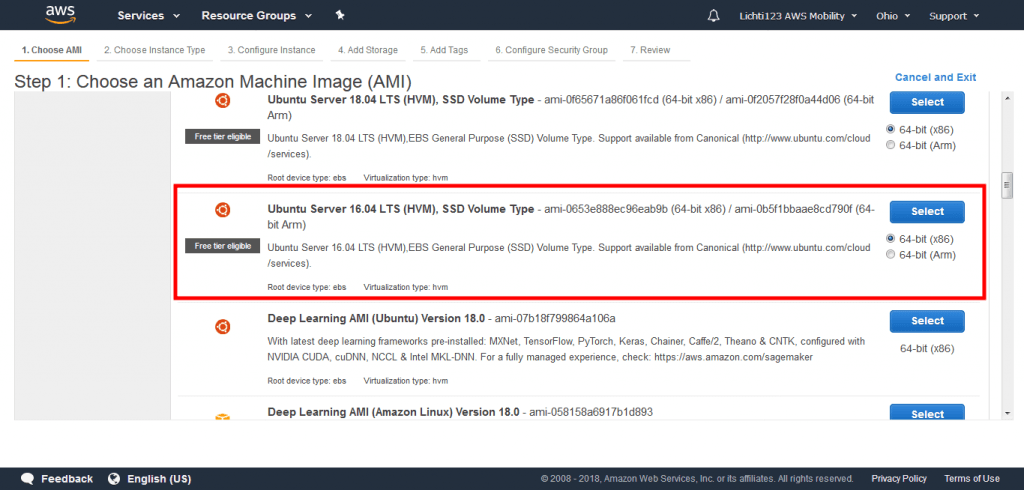
Step 5: Choose an Amazon Machine Image (AMI)
Go with Ubuntu Server 16.04 LTS (HVM), SSD Volume Type – ami-0653e888ec96eab9b (64-bit x86) / ami-0b5f1bbaae8cd790f (64-bit Arm)
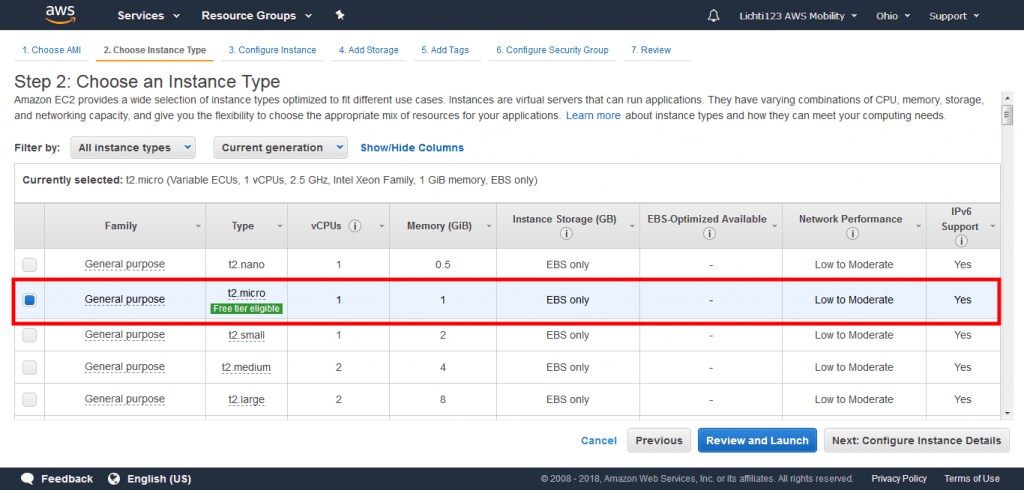
Step 6: Choose an Instance Type
Go with free tier t2.micro instance as a given screenshot
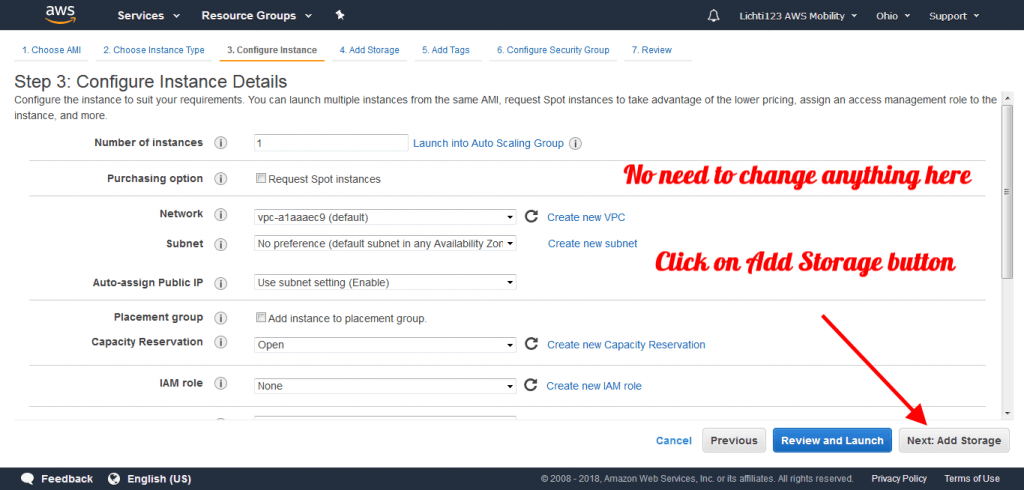
Step 7: Click on the Next configure instance details button and go with the default setting and click on Add Storage button, please check the screenshot
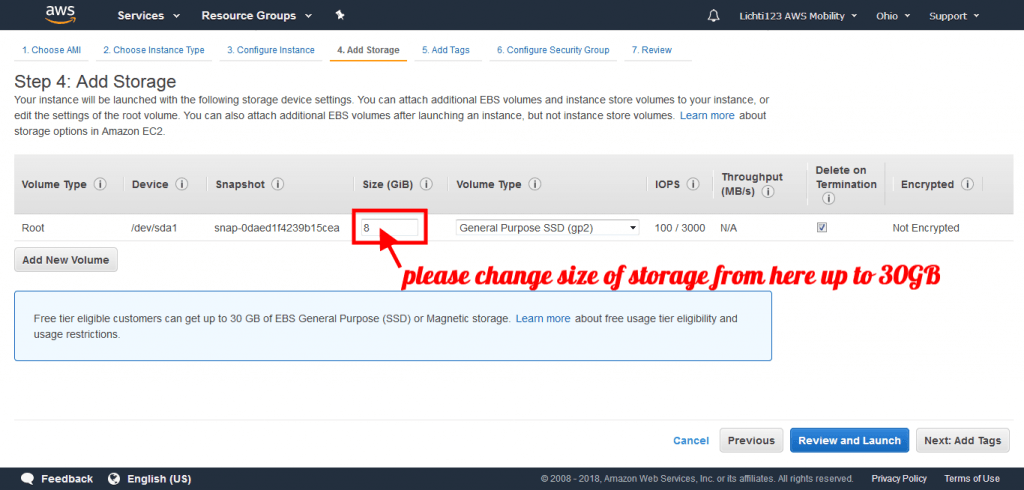
Step 8: Change the storage limit up to 30 GB because only 30 GB is available for the free tier
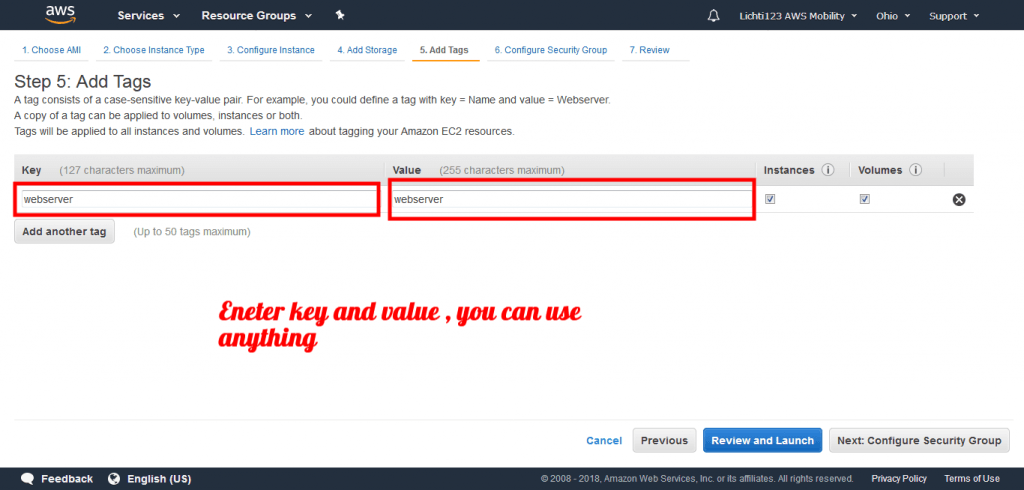
Step 9: Click on the Next: Add Tags button
A tag consists of a case-sensitive key-value pair. For example, you could define a tag with key = Name and value = Webserver.
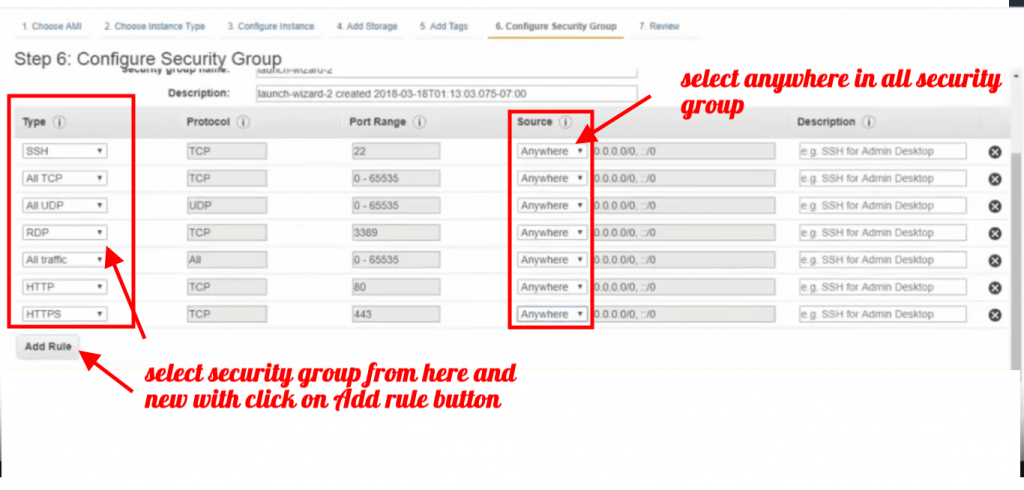
Step 10: Click on Next: configure Security group
These security groups should be added
- SSH
- All TCP
- All UDP
- RDP
- All traffic
- HTTP
- HTTPS
- SMTP
- IMAP
- POP3
In the source tab, select “Anywhere” as given screenshot
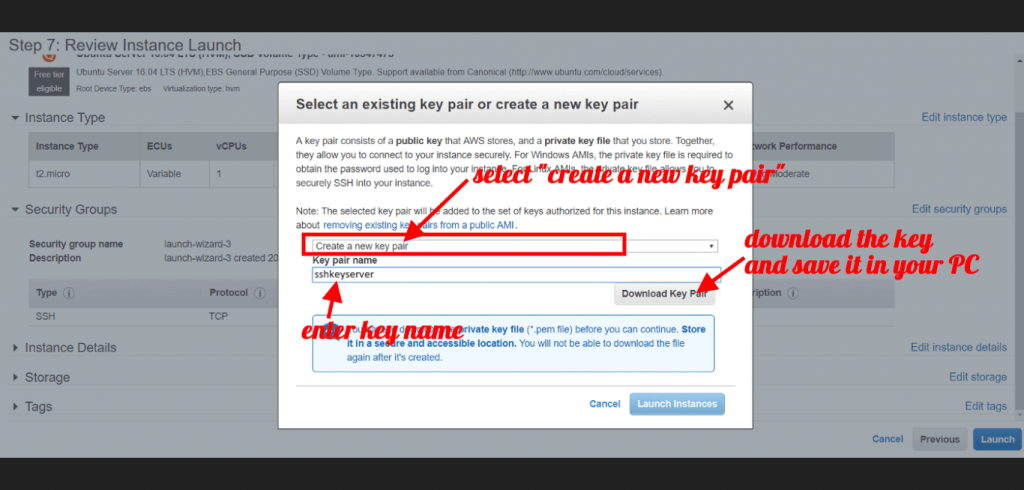
Step 11: Launch the instance by clicking on “Launch”. You will be prompted to create and download a private key. This key will allow you to connect to your instances with SSH. If you don’t download this, or delete it somehow, you won’t be able to connect to your cluster. Name it whatever you like, I just use “sshkeyserver.”
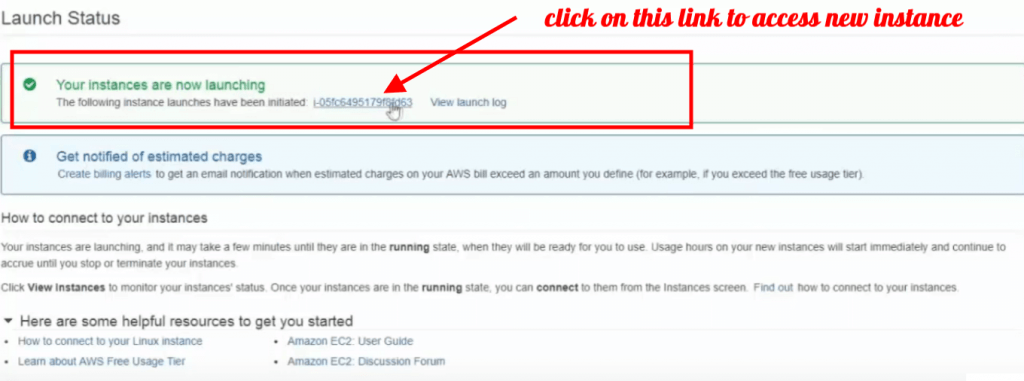
Step 12: Click on Launch Instances Button and wait for some time, there will be our new server. There will be a link to access the instance
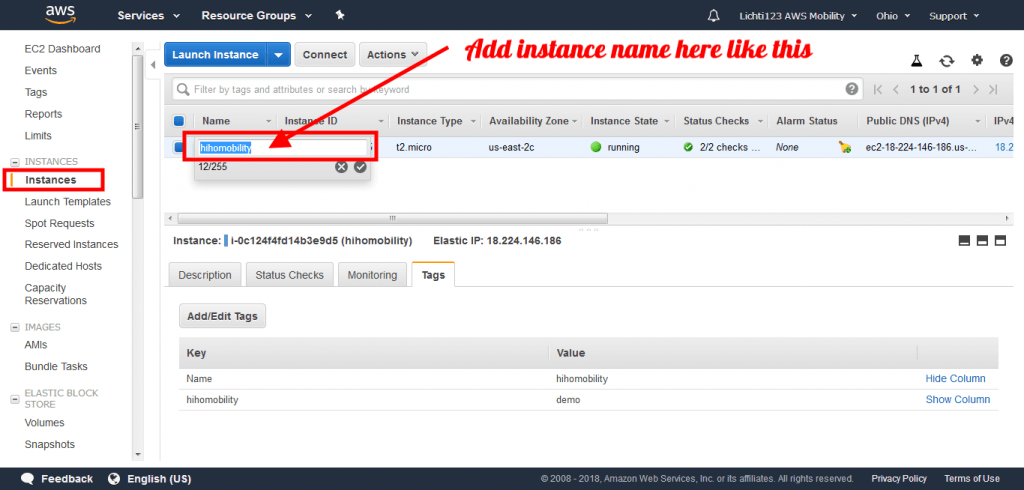
Step 13: Add instance name here
Step 14: Now we have created a private IP to run a web server, for instance, provide a public IP but we can’t run the server on public IP because when we restart the server public IP will change, so follow these steps to create Private IP.
Go in left menu : Network & security > Elastic
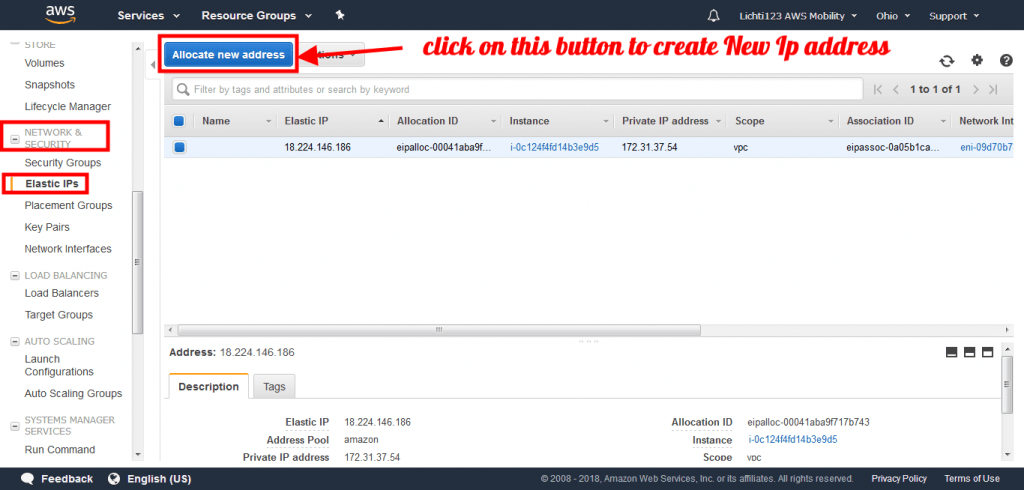
Click on Allocate button and a new IP will be allocated and click on the close button. Now we have to connect this IP to our instance. So click on the Action button and select “Associate Address” and follow these steps.
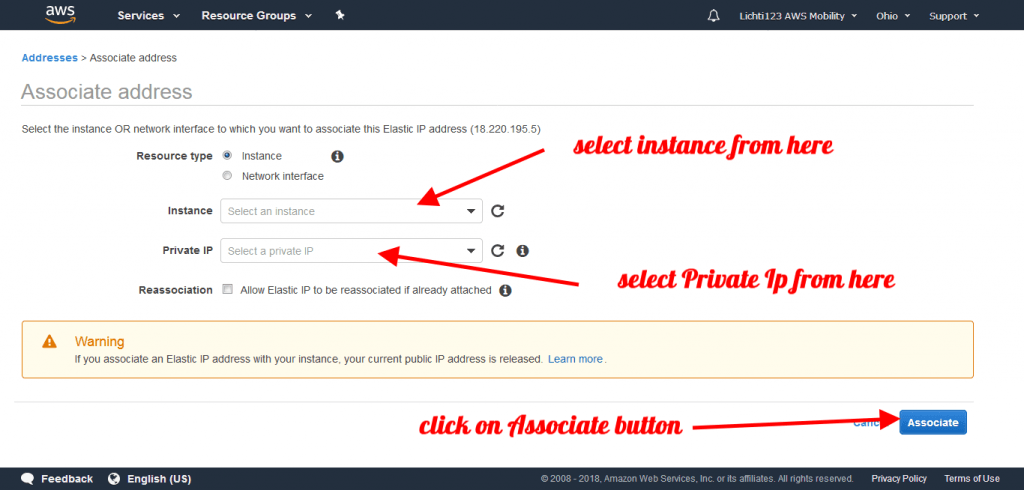
Select instance name and private IP from their respective dropdowns, all the instances name, and private ips will be in their respective dropdowns, and click on the Associate button.
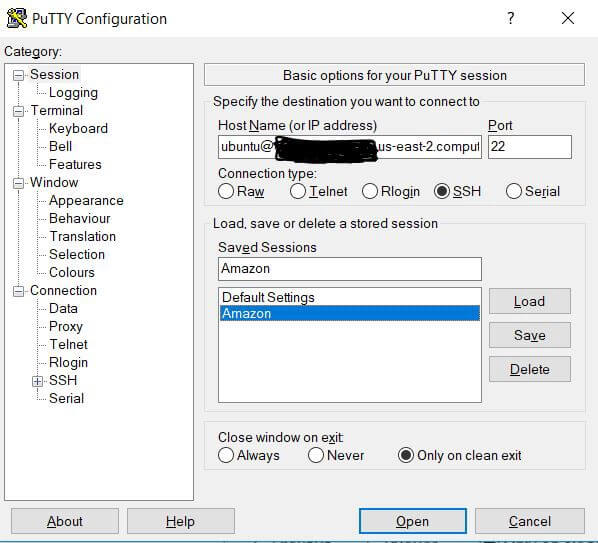
Step 15: How to connect remote instance using putty
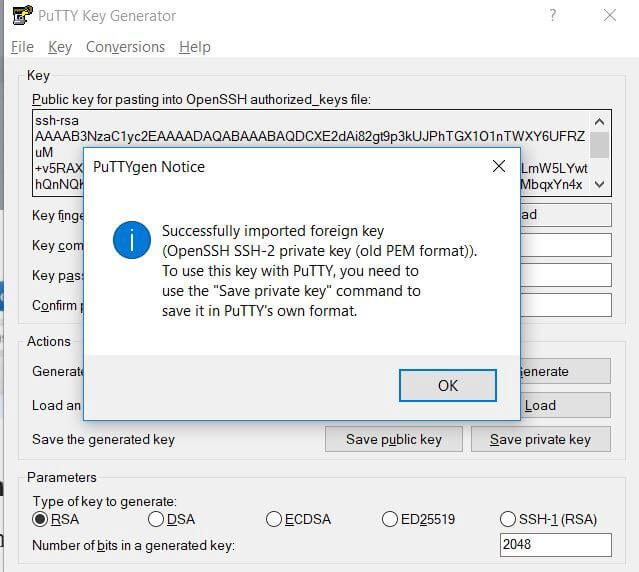
As you have downloaded the key pair (which is with .pem extension), we need to generate a private key(with .ppk extension) to login to the remote instance using putty.
Download putty and install it on PC, By installing putty, PuttyGen will also be installed. Open the PuttyGen, select “File” -> “Load private key”. It will generate the private key. Save private key to a file by selecting “Save private key”.
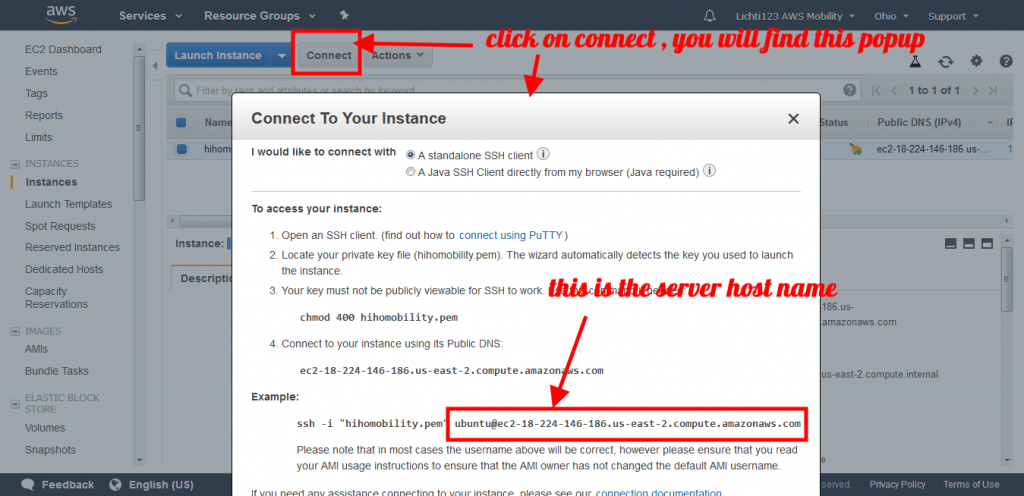
To connect the remote server with putty we need the hostname of the server. Follow these steps to find the hostname from the instance.
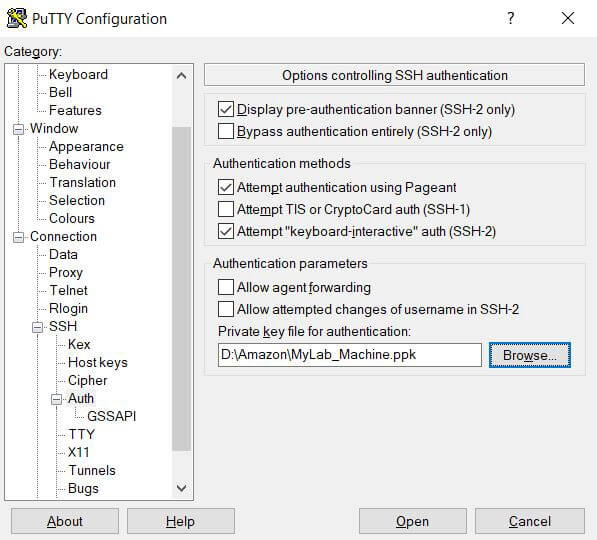
Now open Putty, enter the hostname, to add a private key follow these steps
Select the “SSH” and expand under “Connection”, select “Auth” and then load the .ppk file as shown below
You can save the session by giving it a name and clicking on “Save”.
Click on Open, and “yes” to log in to the server.
How to Setup Vista Control Panel on AWS
Please get back to us if you need any help with “How to setup AWS EC2 Server with Ubuntu 16.04 OS”. We provide service to help our customers to set up AWS EC2 Server with Ubuntu 16.04 OS.